Step-by-step

Setting up the ESP32 Wall Keypad on Hubitat

Seven steps, in order. The first three happen on Hubitat, the middle ones on your computer and the keypad itself, and the last one loops back to Hubitat to finish the connection.

Before you start

You'll need HPM (Hubitat Package Manager) already installed on your Hub, and the keypad itself — powered on and past its factory touch-and-color self-test — sitting nearby with a USB-C data cable.

1
Hubitat

Install the package via HPM

Open HPM, search by keyword ESP32 keypad, and install the result — it brings in both the driver and the app in one pass.
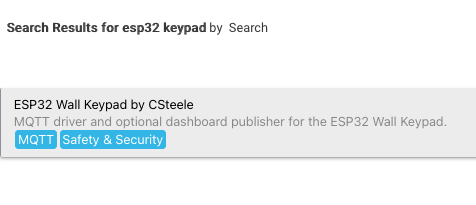
HPM search results for ESP32 keypad, showing the ESP32 Wall Keypad by CSteele package tagged MQTT and Safety & Security
HPM search: "ESP32 keypad"
2
Hubitat

Create the virtual device

Add a new virtual device using the freshly installed ESP32 Wall Keypad driver, and give it an ID — front_door, Bedroom, and so on.

It's an ID, not a name. This same string is what you'll type as the keypad's Device ID in step 6 (default front_door), and it's needed either way you connect — for Hub Direct it's how Hubitat addresses the keypad, and for MQTT it's used to build the keypad's topic. That's why it's restricted to letters, numbers, underscores, and dashes. No spaces.
MQTT only — leave blank for Hub Direct

If you'll be using MQTT, this driver-preferences step is the best place to add the broker info before you flash:

  • MQTT broker host or URI
  • MQTT broker port 1883 default
  • MQTT username / password, if the broker requires them
3
Hubitat

Add the Dashboard app

HPM only installed the code — the app still needs to exist as an instance. Go to Apps → + Add User App and choose ESP32 Wall Keypad Dashboard.
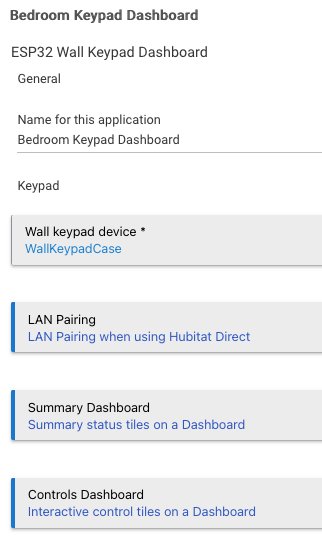
  • Name the app instance (e.g. "Bedroom Keypad Dashboard")
  • Under Keypad, select the virtual device you just created
  • A few buttons appear below that, each opening a page of its own — ignore all of them for now. Only LAN Pairing matters for this guide, and it comes later in step 7
Bedroom Keypad Dashboard app page, showing the app name, Wall keypad device set to WallKeypadCase, and three navigation buttons: LAN Pairing (LAN Pairing when using Hubitat Direct), Summary Dashboard (Summary status tiles on a Dashboard), and Controls Dashboard (Interactive control tiles on a Dashboard)
Dashboard app · main page
4
Computer

Flash the keypad

Plug the keypad into your computer with a USB-C data cable, open the ESP Keypad installer in Chrome or Edge, click Install, and pick the matching serial port. Leave the tab open until it finishes.

This is the only step that needs a data cable — power-only or a battery is fine from here on.
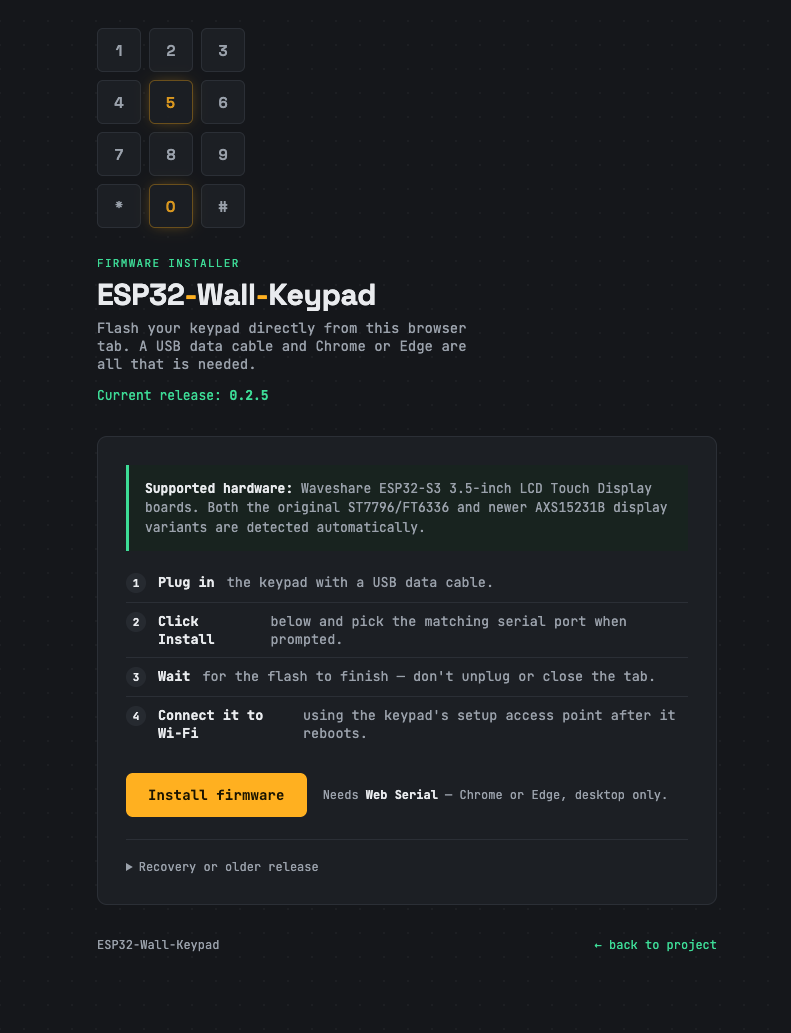
ESP32-Wall-Keypad firmware installer page, showing supported hardware, four numbered steps, an Install firmware button, and a note that Web Serial requires Chrome or Edge on desktop
Firmware installer page
5
Keypad

Connect to the keypad's own Wi-Fi

Once flashing finishes, the keypad reboots into its own access point. On your phone, switch Wi-Fi to the network shown on its screen — starts with Keypad-, followed by the device ID and a short suffix.

If a setup page doesn't open on its own, browse to the address shown: http://192.168.4.1
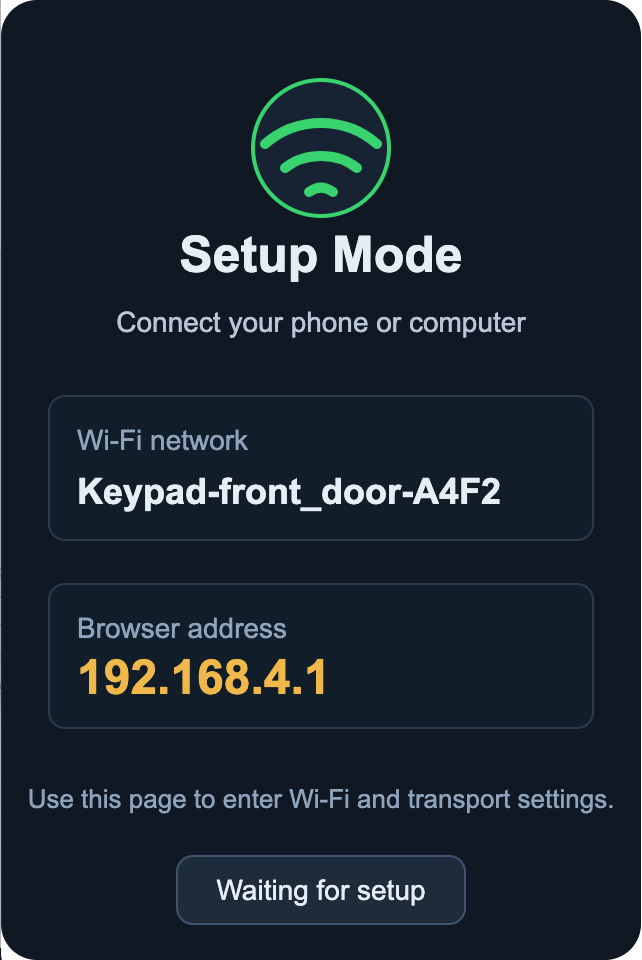
Keypad screen in Setup Mode, showing the Wi-Fi network name Keypad-front_door-A4F2 and browser address 192.168.4.1
Keypad screen · Setup Mode
6
Keypad

Fill in the setup page

At 192.168.4.1, you'll find one form for everything:

  • Device ID — must exactly match the ID you gave the virtual device in step 2
  • Action transport — leave as Auto
  • Home Wi-Fi SSID and password — your regular network
  • MQTT Broker — optional, only if you're using MQTT; use the same address you set on the driver in step 2
  • Hubitat LAN action URL — leave blank for now (or CLEAR to unpair a device being reset)

Tap Save and restart. The keypad drops off its own AP and joins your home network.
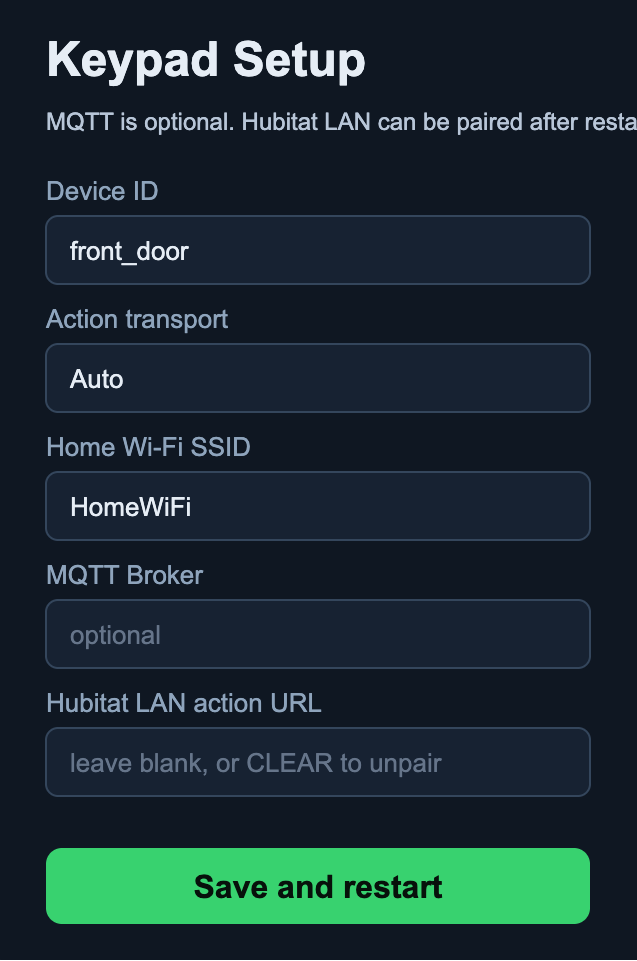
Keypad Setup page with fields for Device ID, Action transport, Home Wi-Fi SSID, MQTT Broker, and Hubitat LAN action URL, and a Save and restart button
Keypad Setup page
Step 7 · finishing the connection

Where the fork actually is

Not a choice you make on the setup page — it's just whether you filled in the broker field. Either way finishes the connection.

If you set an MQTT broker

Already connected

The keypad publishes and subscribes on the broker under its topic, built from the Device ID — no further Hub-side step needed.

  1. Confirm the driver in Hubitat is receiving state
If you left it blank

Pair it from Hubitat

The keypad is on your Wi-Fi but not yet paired. Finish the loop back on Hubitat:

  1. On the keypad, open the ☰ menu → Network — it shows the keypad's IP and a pairing code
  2. In the Dashboard app, tap LAN Pairing to open it, then enter that IP and code
  3. Tap Pair keypad